Now that we’ve checked off the basic needs in each of our bedrooms (you know like beds, window coverings, clothing storage, etc), we’ve shifted our focus towards… adding even more function (hello, I’m John “Practical” Petersik). Last week we shared the current state of our bedroom and today we have a few projects that we did to make our son’s room work a lot harder for him.
We still have some plans to bring in more color, pattern, and fun – but things have definitely gotten a lot comfier & more convenient in here in the past few weeks.
For reference, this is what his room looked like when we first laid eyes on the house back in February. Popcorn ceiling, wall-mounted drying rack, bows drawn on the damp drywall (all of which we quickly learned needed to come out and be fully replaced).
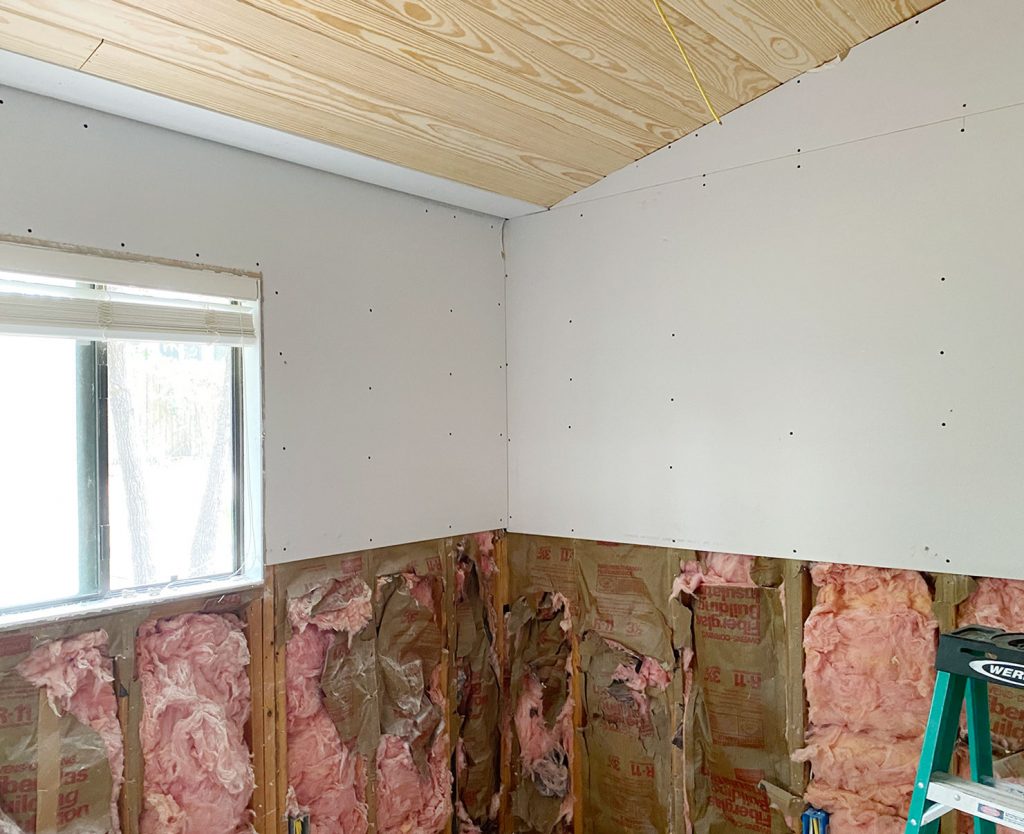
If you remember from our renovation progress post, we quickly realized that this room had a tall sloped roof above it (as well as our daughter’s room) – but there was basically a textured “drop ceiling” hiding that slope from inside the house… which made both rooms perfect candidates for removing those popcorn ceilings and vaulting them to accentuate the higher sloped roofline above. Now there’s just insulation above the ceiling planks and our house’s metal roof above that – which means this wasn’t a very expensive change since it wasn’t structural at all – we just stole some space from a formerly empty attic).
That one change in this room and our daughter’s room instantly made them feel a lot more spacious and extremely special.
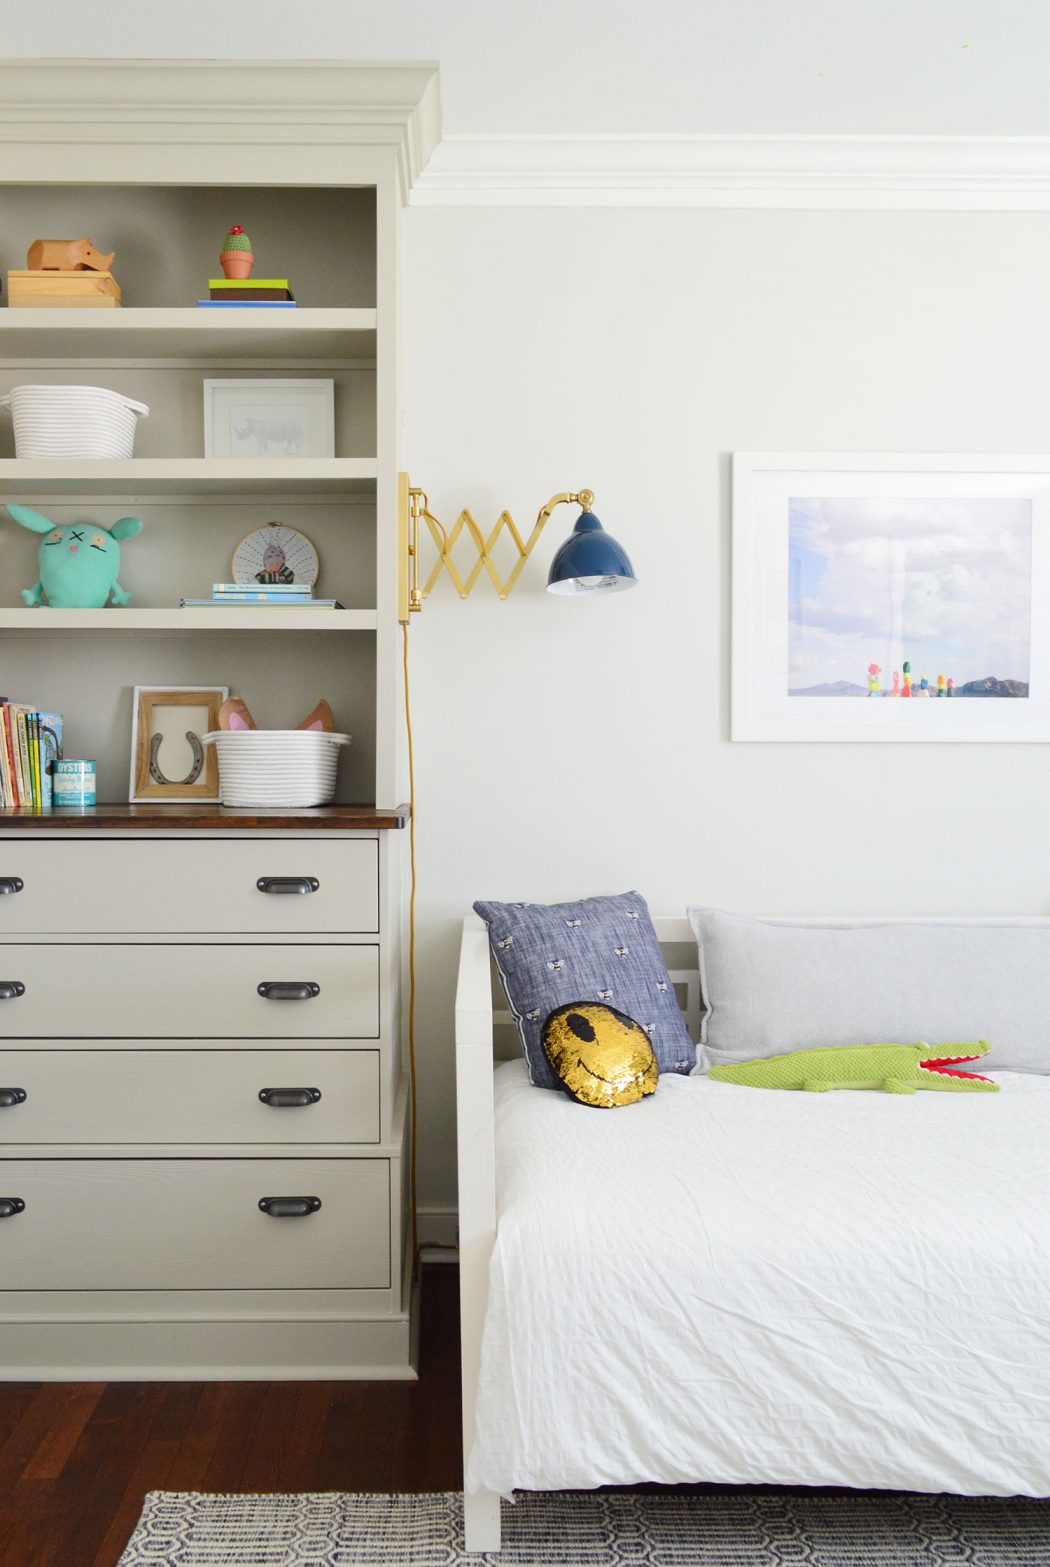
As of earlier this month, this is where his room stood. He requested a bed with big drawers for toys (more on that in this podcast episode) and we hung a few things that he picked for his room, which helped it feel less bare (like the bird mobile that used to hang in our bonus room & the large framed family photo hung in their art room). He also picked his room’s light fixture (he liked that it looked like “a big glowing ball”).
Functionally he was pretty set. He has a closet (it’s the only bedroom with a closet so far!) as well as a dresser on the other side of his room, but his books were crammed unceremoniously in some baskets that baaaaaarely fit in the gap at the end of the bed.
So we got to work on two easy projects that would greatly improve his bed and book situation, without overwhelming the smallest bedroom in our house (which ironically is where both of our kids hang out the most – I think they formed a love of cozy rooms from sharing the beach house bunk room last summer). Anyway, let’s start first with the DIY “wraparound” headboard.
DIY Wraparound Headboard
Every bed looks better with some sort of headboard, and this wraparound style is great for a daybed (if your room is even smaller and the bed perfectly fits into a nook, you could also make a third panel – plus you can make them any height and use any fabric that you’d like). In our case, we knew that having a plush spot to lean back on both of the walls that this bed rests against would not only look better but also make it more comfortable to use. Bonus points if it also stopped stuffed animals from getting lost in the crack between the wall and the bed (spoiler alert: it did the trick).
We’ve done plenty of DIY headboards in our day (like this upholstered one that we used for years), but for this one we threw it back to a technique Sherry used waaaay back in her New York City apartment before we were dating, and later revisited in our niece’s bedroom. It starts with some sort of wooden frame, which helps to keep your project light and inexpensive (especially compared to using a solid piece of plywood or MDF).
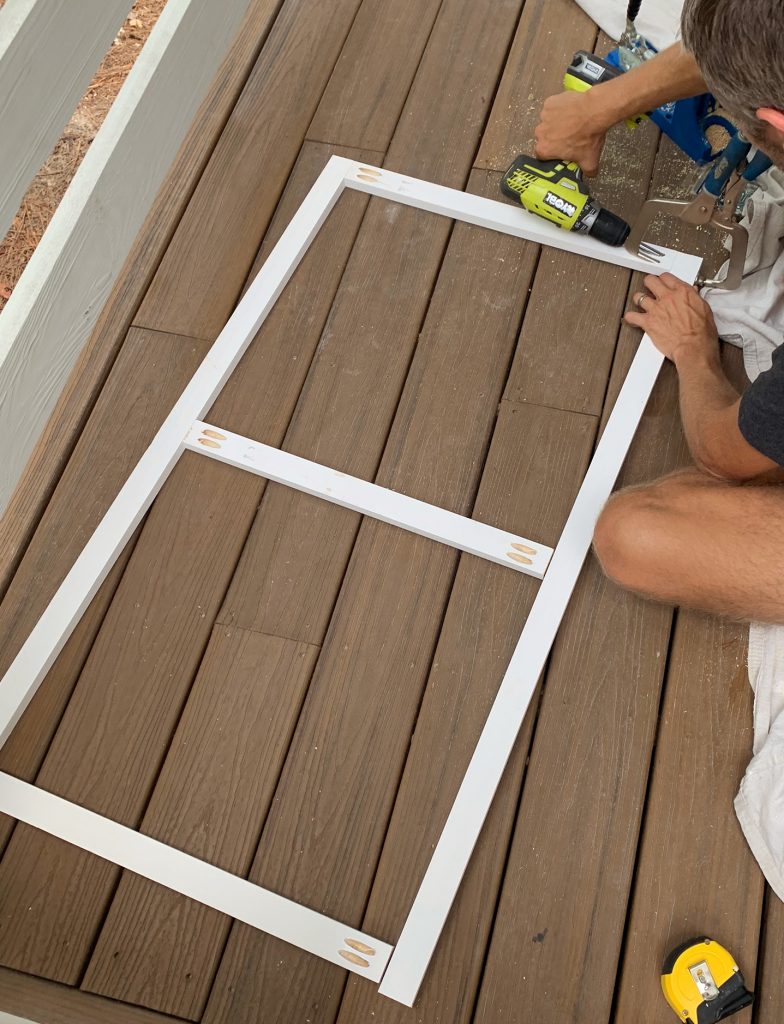
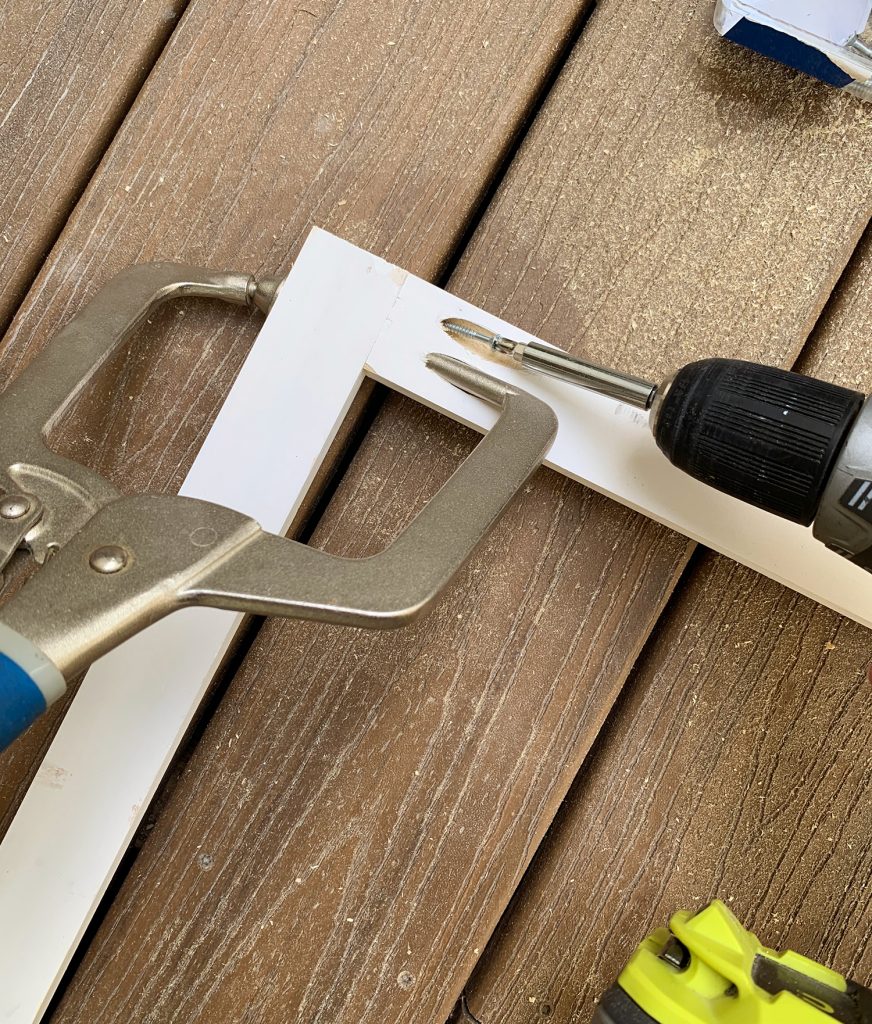
We used 1×2″ boards (they don’t have to be primed, this was just what our store had in stock). I cut them to size and used my Kreg jig & clamp to make pocket holes for securing them tightly together. All of this will be hidden by fabric later so it’s not important that it’s pretty, so if you’d rather just drive screws through the sides of the boards that’s fine too (no jig required). Just drill pilot holes first so your wood doesn’t split.
The beauty of DIYing this is that you can customize your frame size to exactly what you need – just remember that your fabric and batting will add about a 1/2″ to your final size. Our frame was 42″ wide and 25″ tall, which was as tall as we could go without hitting the nearby window molding. I added the middle support just to be safe, but it probably wasn’t 100% necessary.
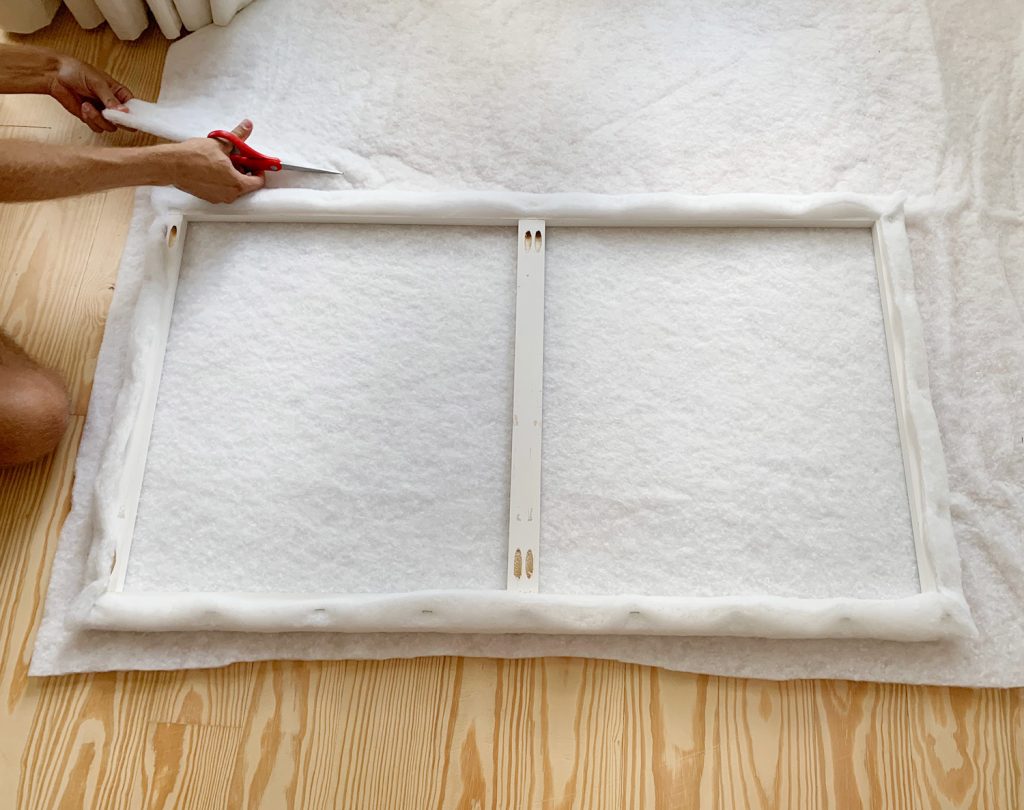
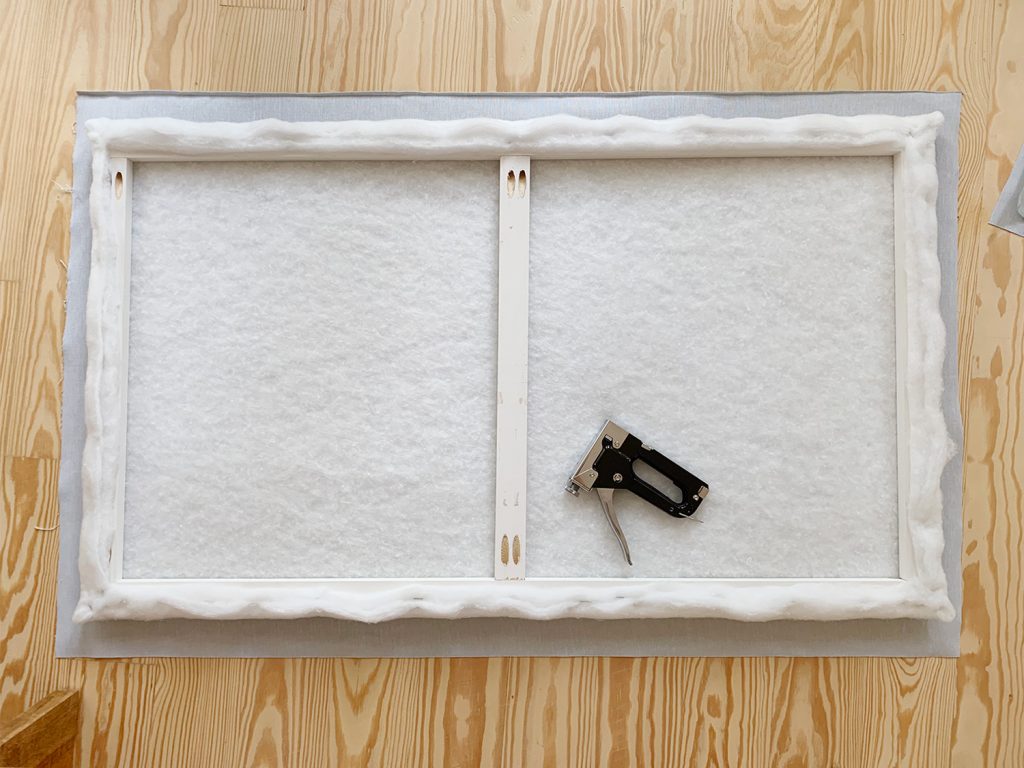
Once you’ve build your frame, it’s time to wrap it – first with batting, then with fabric. Sherry always says: “If you can wrap a present, you can make a headboard” because the process is basically just cutting your material to size (leaving 2-3″ of overhang on all sides) and then folding it over your frame and stapling it in place with a heavy-duty staple gun. At this point Sherry could do this with her eyes closed (except that sounds unsafe, so please don’t actually attempt that).
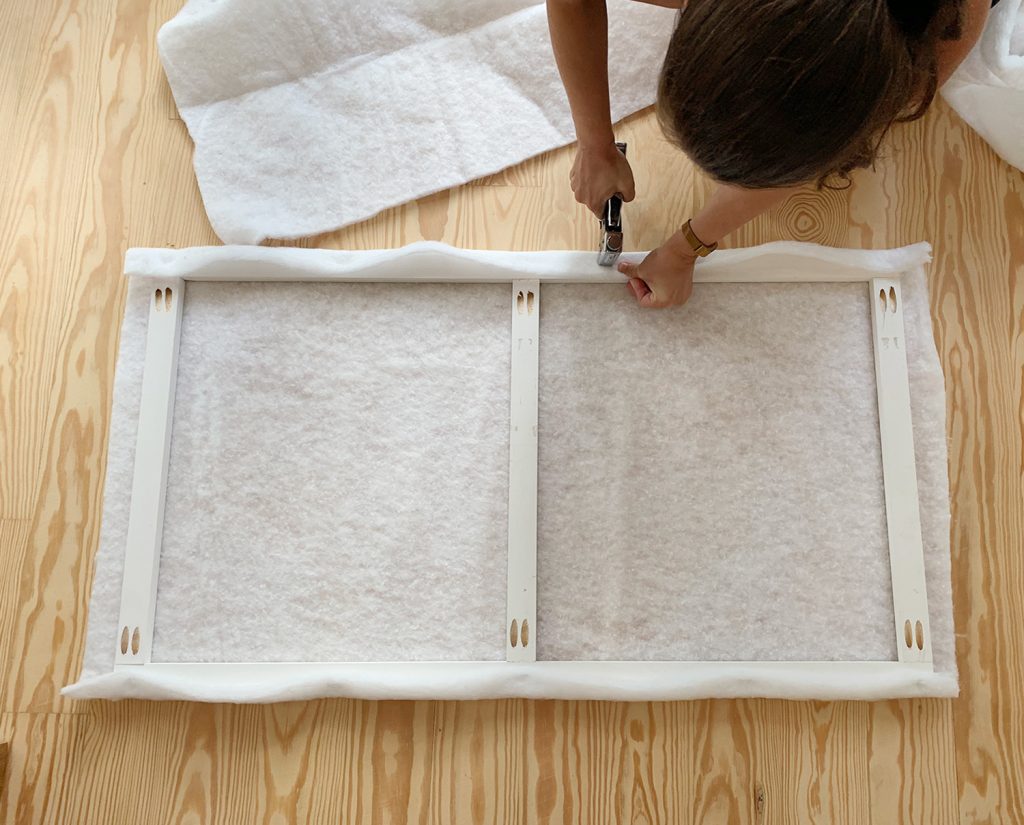
Depending on the thickness of your batting and how plush you want your headboard to feel, you may want to double- or triple-up your batting layers. We did two in this case.
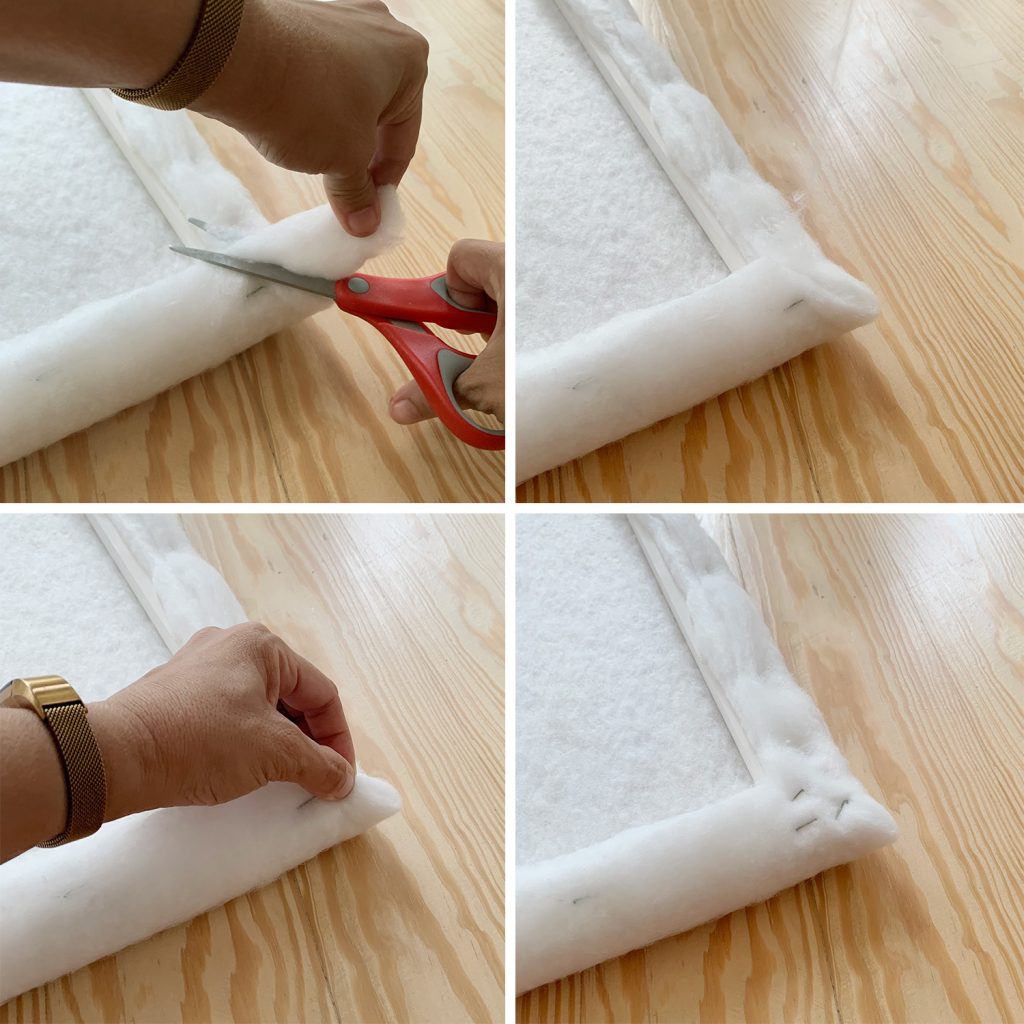
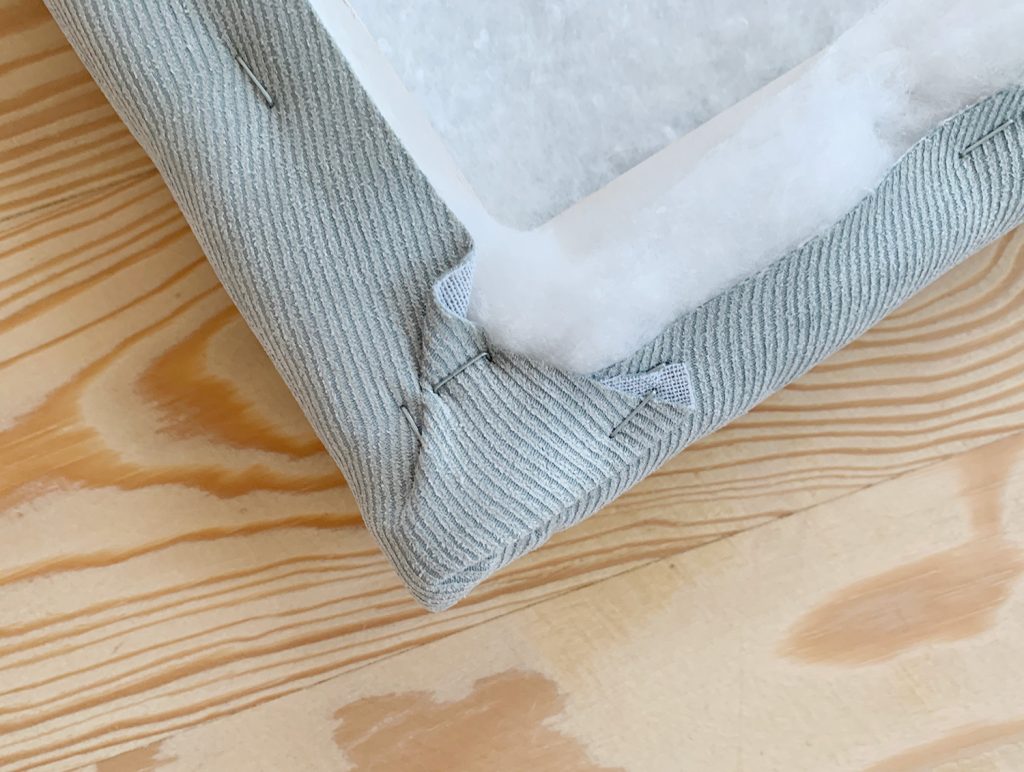
Whenever we share a project like this, people are always curious about how to do the corners. They can be tricky, but here’s a general idea of how we get them to look tidy (from the front, at least) and not turn them into a big bulky mass of fabric. We pull the corners together, trim off the excess and then staple the rest down, trying to keep it as flat as possible.
Then you just repeat the process with your fabric. If you’re choosing a fabric with a pattern that needs to stay aligned or level (like a vertical stripe) you’ll need to be mindful of your placement. And if the fabric has a lot of stretch you need to be careful about pulling it evenly around your frame as you staple, that way you don’t warp your pattern or create accidental darts (choosing “upholstery fabric” typically works really well and isn’t too stretchy).
Again, the corners can be tricky, so just be patient as you figure out the best way to staple it so you get your desired look from the front and side. It’s not unusual for Sherry to fold it around a corner, hold it there without stapling, and flip it over to check that she likes how it looks from the front before securing it with a few staples. That way you can refold things or hold them a different way if it looks off from the front. Remember, the back doesn’t really matter because it gets hidden against the wall. Just don’t make it too bulky because then your headboard won’t sit flush to the wall.
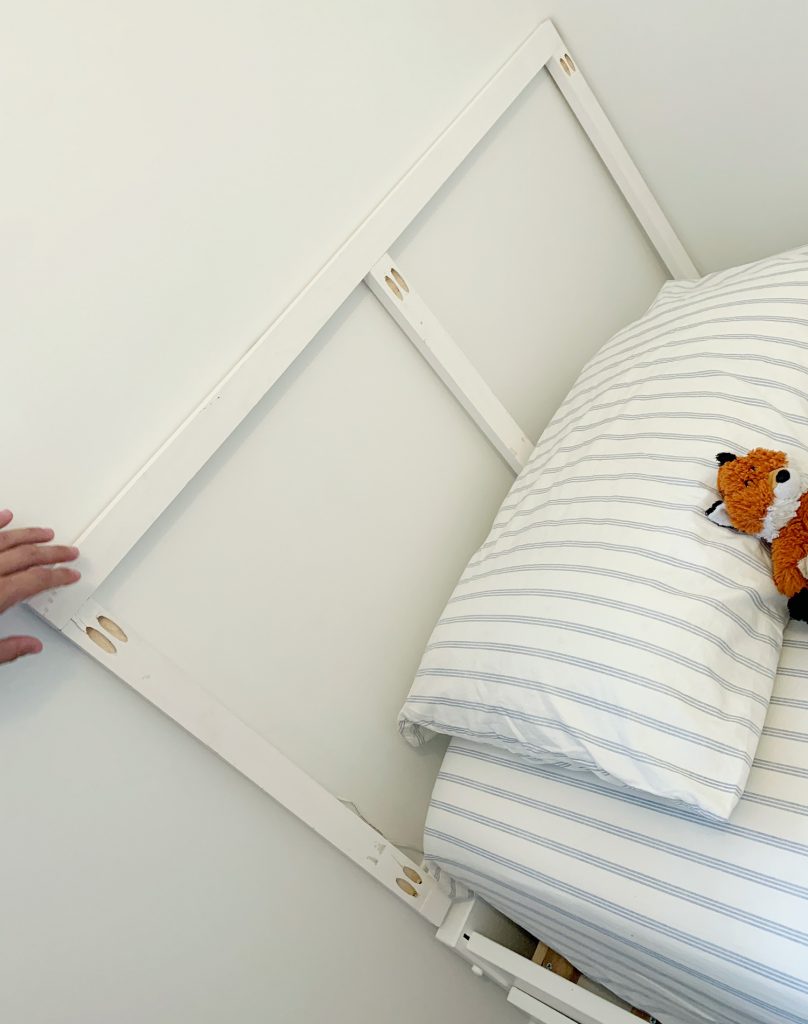
Once we completed our headboard for the head of the bed, we repeated the process for the longer side:
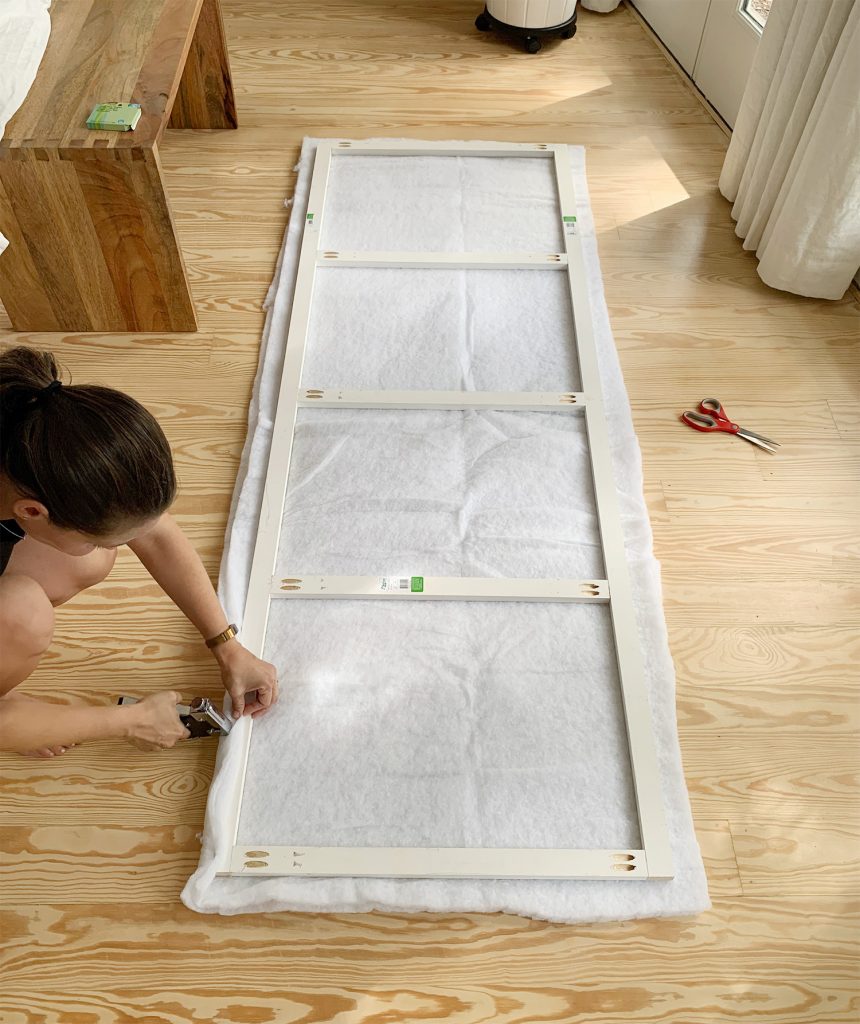
Then, using a level and some long nails along the wall into studs in a few spots, we hung both sides of the headboard in place behind the mattress. Again, the beauty of using a wood frame vs. a solid piece of plywood is that it keeps the finished product nice and lightweight. Which makes hanging it as straightforward as hanging a picture frame.
We’ve still got more to do on this side of the room, but it’s already feeling so much better than where we started.
We didn’t bother securing the two pieces together in the corner – they’re just hung so that they butt up against each other along that seam. And having the mattress wedged against them keeps them fully in place.
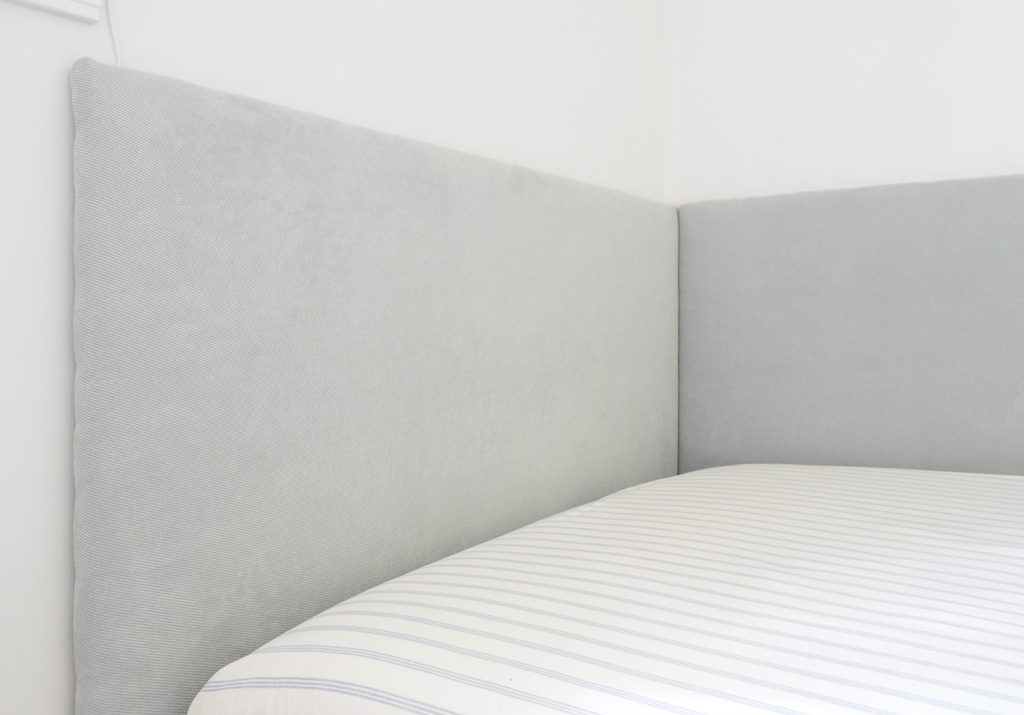
It’s hard to tell in these photos, but the fabric has a subtle diagonal stripe – kinda like corduroy almost. So in person it has a cozy soft feel to it and a nice texture that makes it more interesting than a flat solid sheet of cotton.

But as I mentioned, this project had two parts and the headboards were only the first half. So let’s move on to the built-in book storage (complete with a bonus secret storage compartment!).
Built-In Book Cubby
Remember that our goal here was to improve the book storage at the foot of our son’s bed. We considered just buying a tall bookcase to squeeze in there (facing the bed so you can grab things to read from there) but the bed would make the bottom few shelves unusable.
He doesn’t have a need for a tall bookcase-worth of storage right now, so we didn’t want some hulking piece that we just filled up with unnecessary stuff that couldn’t easily be reached by him. Because in retrospect, the built-in bookcases in his last room ended up being mostly decorative – apart from the books he could reach himself on the lowest shelf.
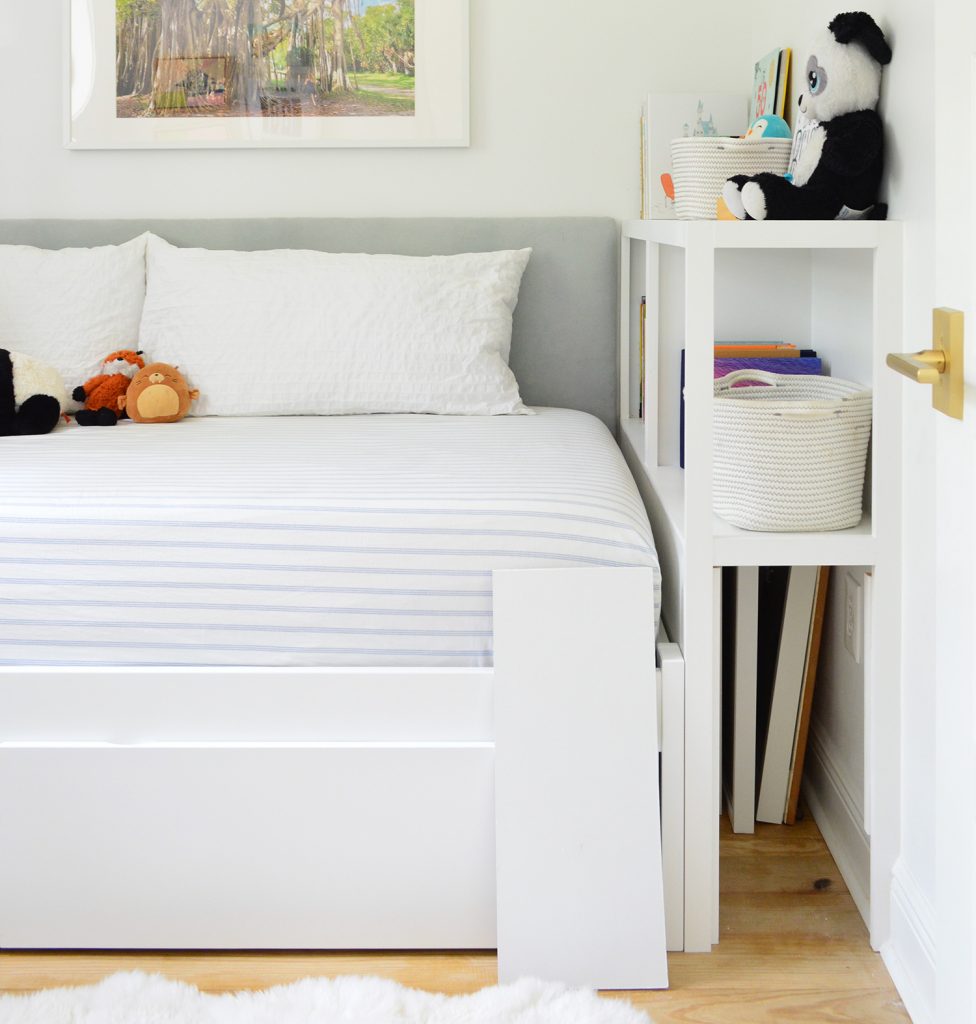
So in order to take advantage of that space below the bed AND not go overkill with storage, we decide to build something custom. It’s admittedly a bit of weirdly specific piece (and we winged it as we went) but this finished photo gives you a sense of where we were headed.
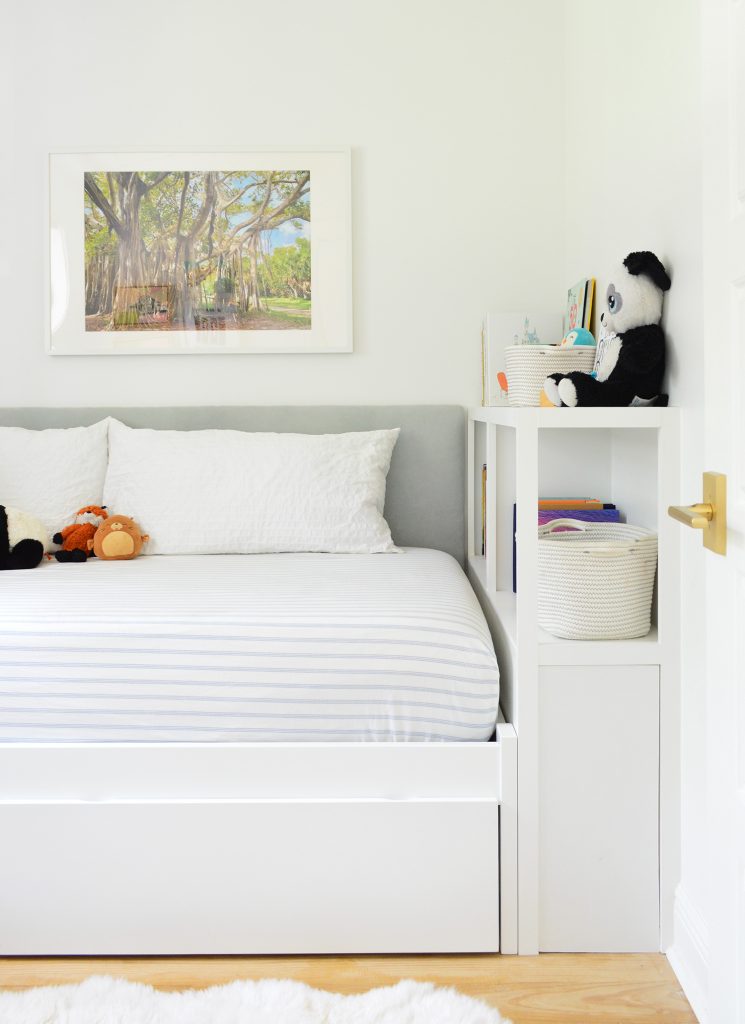
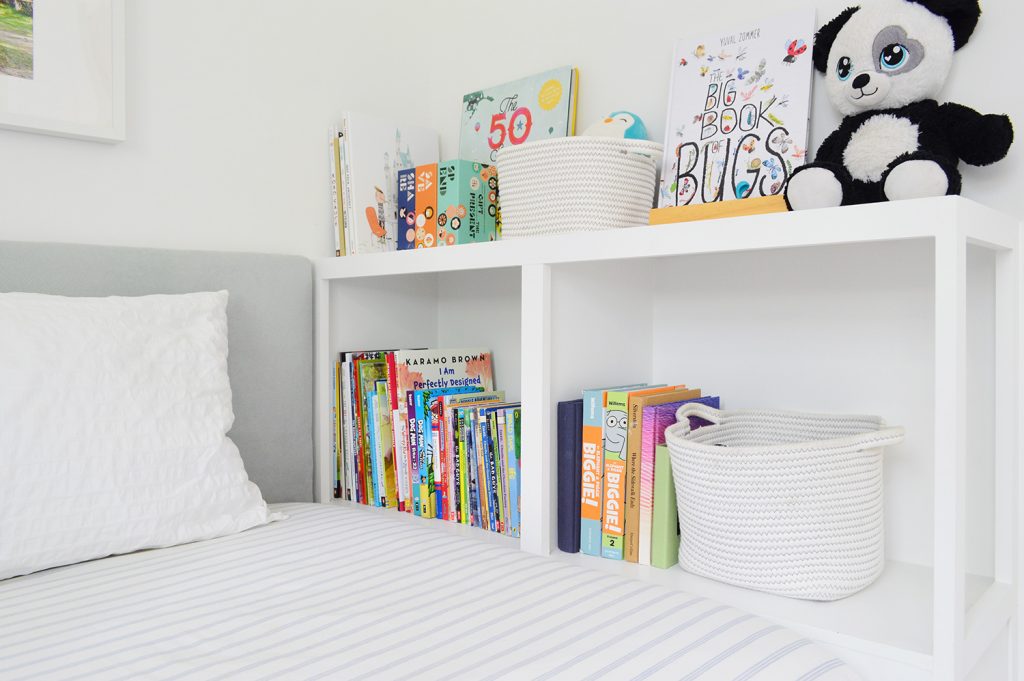
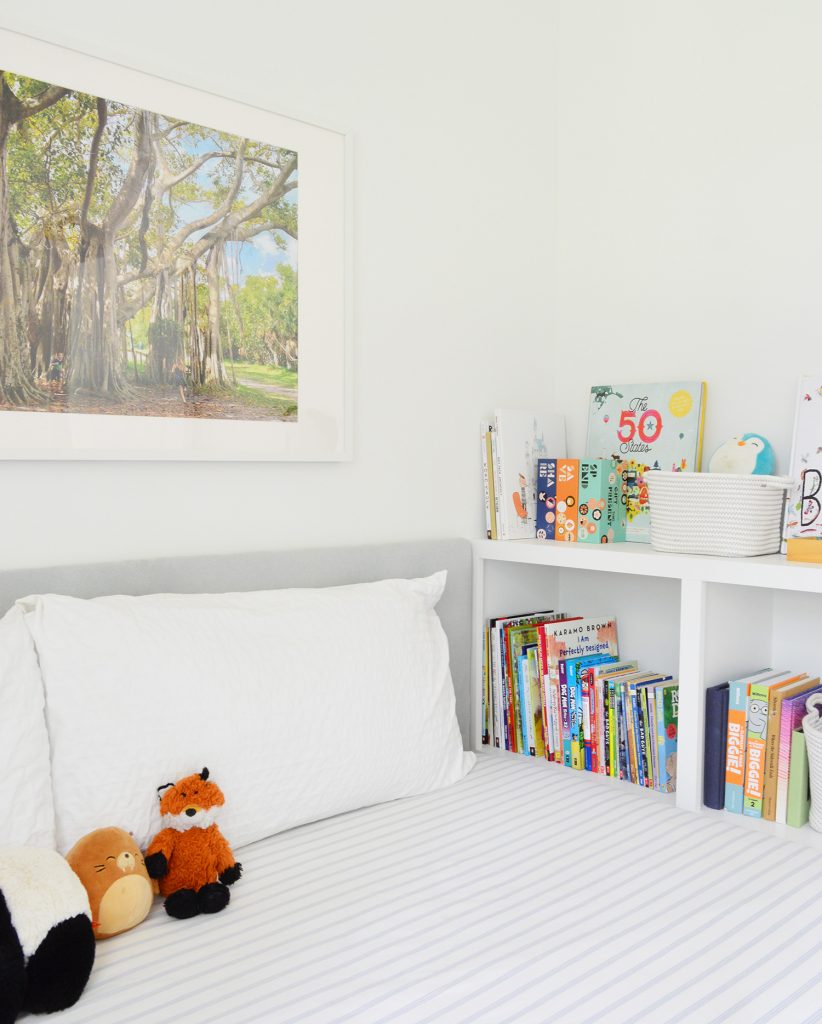
It’s basically a single bookshelf (book cubby?) that also has an additional plane of storage on top, which ended up yielding lots of good storage – all of which he can easily reach himself.
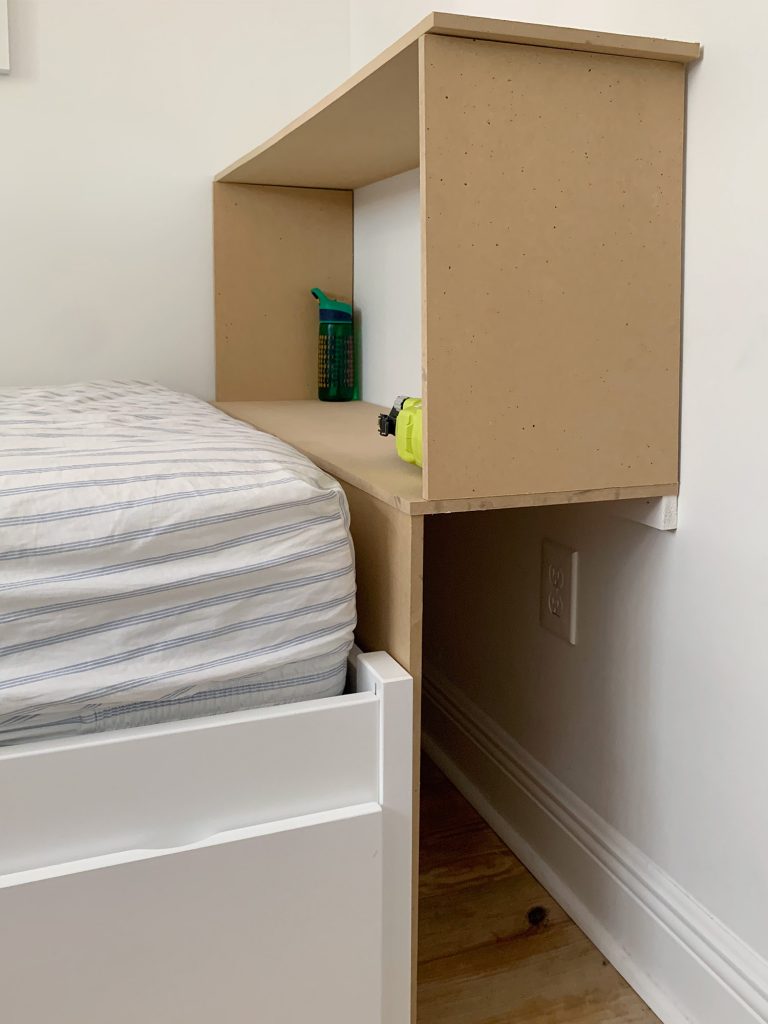
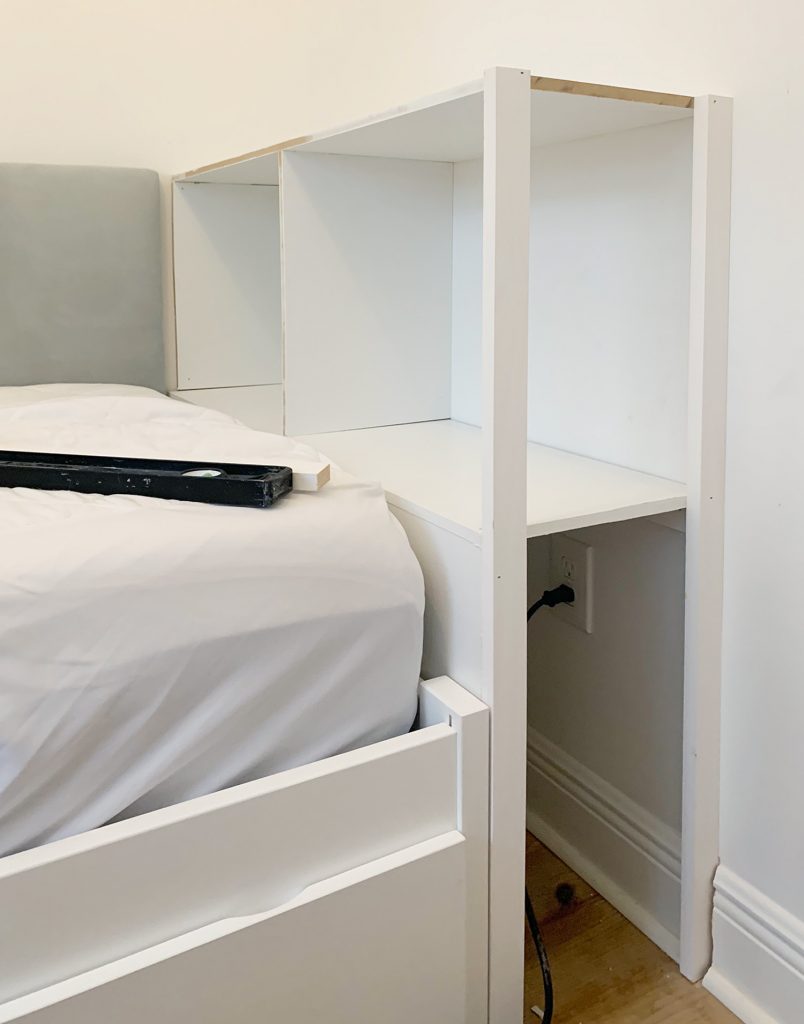
Our general construction technique was designing it to rest on a support rail on the side and back wall as well as adding a few front frame pieces for additional support (you’ll see those a few photos down). We also rested it on a solid piece of MDF along the foot of the bed so things couldn’t fall off the bed and get trapped under there. The lost stuffed animal struggle is REAL.
We used 1/2″ MDF to construct it because once it’s painted it has a nice smooth finish to it. We actually primed and painted all of the main pieces before constructing it because we knew it would be a pain to paint it in place. So once everything dried we started assembling it with glue and nails.

We knew a middle divider would not only help with the integrity of the shelf, but would also help to keep his books more organized than one big open box. You can also see how the vertical pieces and the top shelf are a little bit shallower than the bottom shelf. This accounts for the 1×2″ face pieces that we added to finish off the raw edges and make everything look more polished and substantial.
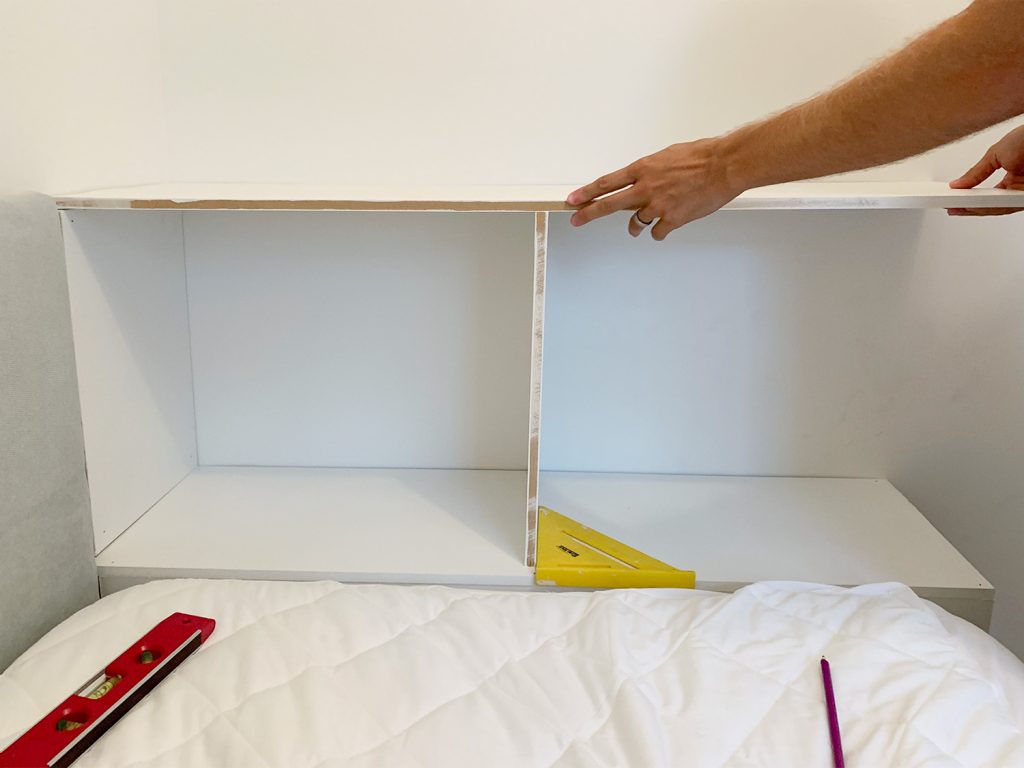
Speaking of 1×2″ face pieces, we opted to use them as both finishing pieces AND supports on the open end of the shelf. Up until this moment we debated whether or not this end should be another solid MDF piece. But after cutting pieces of both options, we decided the open-ended design felt better to us while standing in the room (we held up a solid piece to weigh that option but liked the open design better).
Next we trimmed out the front with the finish pieces, caulked everything, and gave it one last coat of paint (wherever we could reach!) to help the whole thing look seamless. And voila!
Oh, and instead of nailing in a solid piece to cover the bottom part, we made it so that it easily pops out when you push on the right spot in the right way so we can use that otherwise empty space for – yup, even more storage. We nailed in a couple of scrap 1×2″s along the inside lip so that the removable piece rests snugly in place when we want to conceal the storage and press the door into place – but it easily pops out when we need to get in there with the right pressure in the right spot (maybe Sherry can demonstrate this magical move in IG Stories or something).
Right now it’s hiding some spare picture frames because our son doesn’t have any need for additional storage (remember he also has a closet, a dresser, and those two huge drawers under his bed). But as he grows if he does have a need for it, we’re happy to hand it over. We could even add a handle to pop the door off a little more easily anytime he wants to access things down there.
As you can see from the photo below, we built the bookshelf to the exact height of the headboard so that it all reads as one sort of wraparound unit that cozies up his bed on all three sides. We debated painting it to match the blue-gray headboard (and at one point were both leaning that way) but once it all came together we thought it was nice for it to blend in with the walls for now because we’re debating a few other ways to use some fun color and pattern in here and we didn’t want to paint the bookcase and then wish we had used color on a mural for the back wall or some wallpaper on the side wall or something.
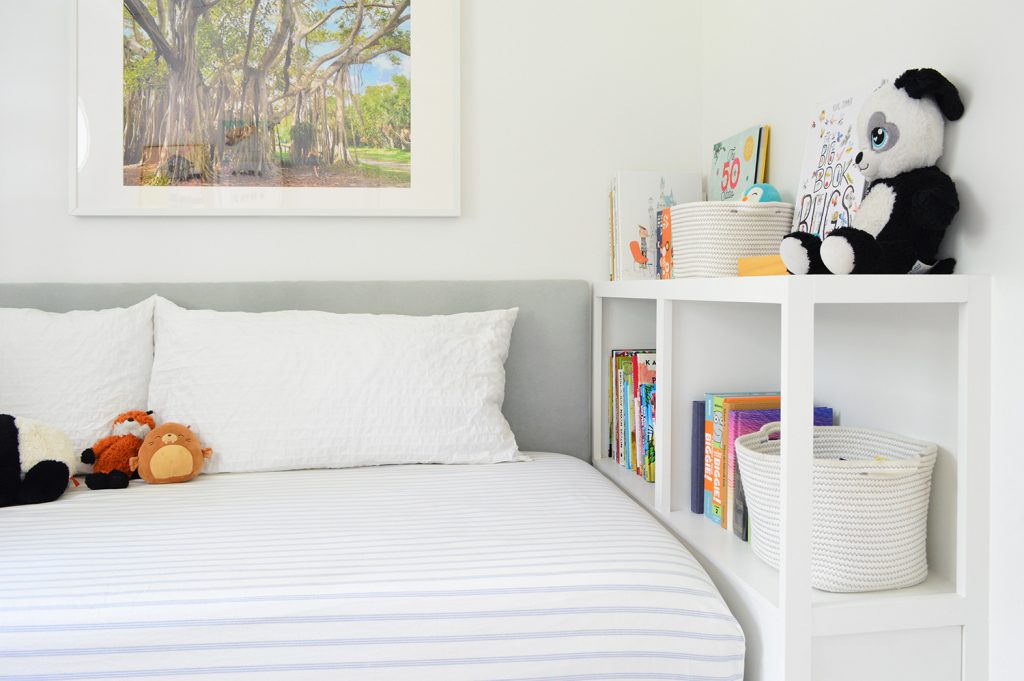
So yeah, this room is far from done, but I can’t express how great it has been to have all of our nighttime reading books RIGHT THERE when it’s time to pick out a bedtime story. He’s also happy to have a spot for those baskets which each house some very precious collections (like Pokemon cards). It’s crucial to have those nearby in case there’s a middle of the night Pokemon emergency, amiright?
When it comes to the Benjamins, our grand total for both projects was less than $135 (it broke down to about $35 for MDF, $30 for the 1×2″ face pieces, and $70 for the fabric & batting). We even had enough extra fabric to complete an entirely separate project in another room – so maybe we can get that photographed to share next week.
As I mentioned, we have some other ideas brewing for this bedroom, including some sort of paint or wallpaper treatment (we’re collecting some ideas to show our son and see which one he wants to go for). So this is just what it looks like about 8 weeks into living here. It’s fun to imagine where we’ll end up. And we’re currently working on a VERY COLORFUL project in our daughter’s room, so we can’t wait to show you how that turns out.
P.S. To follow along with our entire reno of this house, you can see every single update we’ve made right here in this FL House archive.
*This post contains affiliate links, so we may earn a small commission when you make a purchase through links on our site at no additional cost to you.
